As an Amazon Associate, I earn from qualifying purchases.

Achieving luscious, long lashes has become a sought-after trend in the ever-evolving beauty world. One crucial element in this pursuit is mastering the art of using bond and seal lash glue. This adhesive duo plays a pivotal role in ensuring your false lashes stay put, framing your eyes with a captivating allure. Let’s dive into the details of how to use bond and seal lash glue effectively.
Introduction
The suitable lash glue can make all the difference in the quest for mesmerizing lashes. Whether you’re a beauty enthusiast or a professional makeup artist, understanding the nuances of bond and seal lash glue application is essential.
Understanding the Ingredients
Before delving into the application process, it’s vital to grasp the composition of lash glue. Ingredients like cyanoacrylate and polymers contribute to the adhesive properties, providing a secure bond without compromising comfort.
Choosing the Right Bond and Seal Lash Glue
Not all lash glues are created equal. Factors such as your skin type, the type of lashes you’re using, and your desired hold time should influence your choice. Explore the market for options that cater to your specific needs.
How to Use Bond and Seal Lash Glue
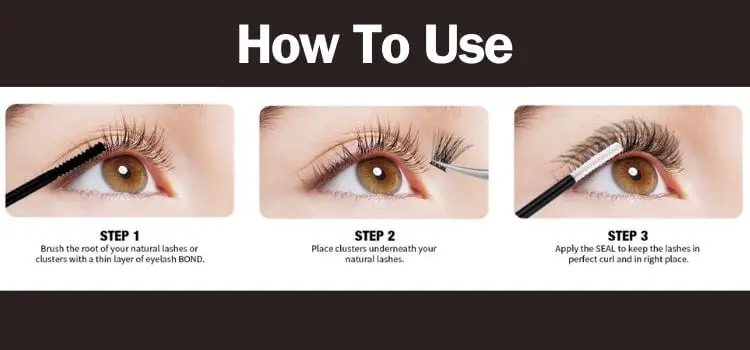
Step-by-Step Guide for Application
Achieving a flawless lash application requires precision. These steps ensure your lashes stay in place throughout the day, creating a stunning, natural look.
Prepare Your Lashes:
Start with clean, dry lashes. Remove any makeup or oils to ensure optimal adhesion.
Apply Bond Lash Glue:
Apply a thin layer of bond lash glue along the lash strip using a small applicator or the provided brush.
Wait for Adhesive to Get Tacky:
Allow the bond glue to become slightly tacky before proceeding to the next step. This ensures a more robust bond when attaching the lashes.
Place the Lashes:
Carefully position the false lashes along your natural lash line, pressing gently to secure them in place.
Seal with Lash Seal Glue:
Once the lashes are in position, apply a thin layer of seal lash glue over the lash line to set the adhesive and prolong wear.
Final Touches:
Adjust the lashes as needed and let the glue dry completely. Finish with a coat of mascara for a seamless blend.
Tips for Long-lasting Lash Adhesion
To extend the life of your lash application, consider these tips:
- Avoid Water Contact:
- Refrain from exposing your lashes to water for at least 24 hours after application to allow the glue to set fully.
- Gentle Removal:
- When removing false lashes, use a gentle makeup remover to dissolve the adhesive without pulling on your natural lashes.
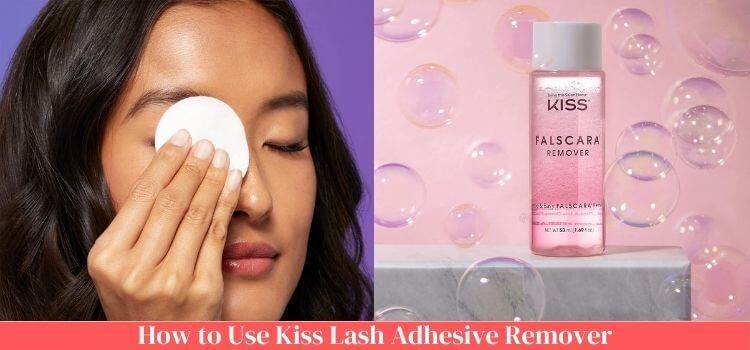
Removing Lash Glue Safely
Removing lash glue doesn’t have to be a daunting task. For a painless and safe removal procedure, adhere to following steps:
- Soak a Cotton Pad:
- Dampen a cotton pad with a mild makeup remover or micellar water.
- Place on Lash Line:
- To dissolve the lash adhesive, gently press the cotton pad soaked in remover against your closed eyes.
- Wipe Away Residue:
- After a few seconds, wipe away any remaining adhesive residue with a clean cotton pad.
Common Mistakes to Avoid
Even the most seasoned lash enthusiasts can make mistakes. Here are common pitfalls to steer clear of:
- Using Too Much Glue:
- Applying excessive glue can lead to clumping and an unnatural appearance.
- Skipping the Tacky Stage:
- Rushing the application process may result in weaker adhesion. Allow the glue to become tacky before attaching the lashes.
Bond and Seal Lash Glue Varieties
The beauty market offers a plethora of lash glue options. From clear to black, latex-free to hypoallergenic, explore the variety to find the perfect match for your preferences.
Addressing Allergies and Sensitivities
Opt for hypoallergenic lash glues if you have sensitive skin or a history of allergies. To verify compatibility, do a patch test prior to completing the application.
Maintenance and Aftercare
To maximize the lifespan of your lashes, adopt a proper aftercare routine. Avoid rubbing your eyes, and be gentle when cleansing your face to preserve the adhesive bond.
Troubleshooting Issues
Do you need help with your lash application? Check out these solutions:
- Lashes Peeling Off:
- Reapply lash glue to the areas where the lashes are lifting, pressing gently to secure them in place.
- Irritation or Allergic Reaction:
- If you get irritation or an allergic response, stop using it right away and see a dermatologist.
Expert Recommendations
For professional insights, seek advice from makeup artists and beauty experts. They can provide valuable tips for choosing the right lash glue.
DIY Lash Glue Recipes
Feeling adventurous? Explore making your own lash glue at home using natural ingredients like aloe vera gel and honey. But use caution and run a patch test before finishing the application.
The Future of Lash Glue Technology
Stay informed about the latest trends in lash adhesive technology. Innovations like magnetic lashes and improved formulations are continuously reshaping the beauty landscape.
Conclusion
Mastering the art of using bond and seal lash glue is a game-changer for anyone seeking the perfect set of lashes. From understanding the ingredients to troubleshooting common issues, this guide equips you with the knowledge to achieve a flawless lash application.