As an Amazon Associate, I earn from qualifying purchases.
Hoodie sweatshirts are versatile and comfortable clothing items that can be customized to suit your style. Cutting it can be a fantastic option if you want to add some edge and uniqueness to your hoodie. This DIY fashion guide will walk you through cutting a hoodie sweatshirt to create a trendy and stylish look.
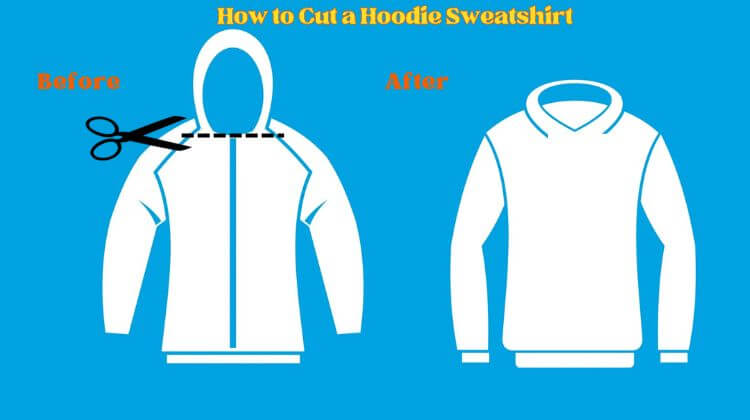
How to Cut the Hood of a Sweatshirt:
1. Preparing Your Hoodie
Before you start cutting your hoodie, gather the necessary materials. You will need a hoodie sweatshirt, fabric chalk or washable marker, sharp scissors, and a ruler or measuring tape. Choosing a hoodie that you don’t mind altering is essential, and ensuring it’s clean and free from wrinkles before you begin.
2. Marking the Design
Mark the areas where you want to cut your hoodie using fabric chalk or a washable marker. Consider the design you want to achieve and plan accordingly. You can experiment with various cuts, such as crop tops, off-the-shoulder styles, or asymmetrical designs. Take time to envision the final look and make precise markings to guide your cutting process.
3. Cutting Techniques
When it comes to cutting your hoodie, there are several techniques you can try. Here are a few popular options:
a. Crop Top
To create a crop top hoodie:
- Mark the desired length from the bottom.
- Use your fabric scissors to cut straight along the drawn line.
- For a more distressed look, make minor vertical cuts along the edge of the hemline.
b. Off-the-Shoulder
For an off-the-shoulder style, mark the center of the neckline and cut a straight line from the center to one shoulder seam. Repeat the process on the other side. To make it more personalized, adjust the width of the shoulder opening based on your preference.
c. Asymmetrical Design
To achieve an asymmetrical look, mark the areas where you want to create different lengths. Cut along the drawn lines, keeping the cuts clean and even.
Remember to start with minor cuts and try on the hoodie as you go to ensure the desired fit and style.
4. Adding Finishing Touches
Once you have cut your hoodie, you can add some finishing touches to enhance its appearance. Here are a few ideas:
a. Frayed Edges
If you want a more rugged look, use a pair of tweezers to pull out a few threads along the cut edges. This will create a frayed effect, adding texture and interest to your hoodie.
b. Lace or Ribbon Accents
You can sew lace or ribbon along the cut edges for a feminine touch. This embellishment can add elegance and make your hoodie stand out.
c. Embroidery or Iron-On Patches
Personalize your hoodie further by adding embroidery or iron-on patches. You can create intricate designs or showcase your favorite symbols or quotes.
5. Styling Tips
Now that you have transformed your hoodie into a unique fashion piece, here are some styling tips to make the most of your new creation:
- Pair your cropped hoodie with high-waisted jeans or skirts for a trendy and balanced look.
- Layer your off-the-shoulder hoodie over a contrasting color or patterned top to create visual interest.
- Wear your asymmetrical hoodie with leggings or skinny jeans for a modern and edgy outfit.
Experiment with different combinations and accessories to create your personalized style.
6. Safety Precautions
While cutting a hoodie is a fun and creative DIY project, it’s essential to prioritize safety. Remember the following precautions:
- Always use sharp fabric scissors to ensure clean cuts and avoid accidental injuries.
- Work in a well-lit and spacious area to prevent accidents.
- Take breaks if you feel tired or sleepy during the cutting process.
Conclusion
Cutting a hoodie sweatshirt allows you to unleash creativity and transform a basic garment into a unique fashion statement. You can achieve stunning results with the proper techniques and a little imagination. Remember to plan your design, take precise measurements, and use the appropriate cutting techniques. Personalize your hoodie further with finishing touches like frayed edges, lace accents, or embroidery.